Do you use an Apple Mac? If you do then Time Machine is a great way of backing up your files from your machine to an external drive on a frequent basis.
So some quick tips about Time Machine:

- Dedicate at least one external hard drive to Time Machine, don’t be tempted to use it for other files as well. It reduces the capacity. If you need an external drive for other files buy another drive.
- Leave the drive connected all the time. If you are using a Macbook (Laptop) then an external drive that connects to your network or your router (Western Digital MyCloud) is a good alternative to one hard-wired to your machine.
- Buy a large drive, the bigger the drive the longer Time Machine can keep backups for before it starts deleting old back ups.
- If you buy a larger drive at a later date, it is possible to transfer your previous backups to the newdrive, see this article for details. I’ve done this a few times and it’s fairly involved but follow the steps shown and you should retain all your previous backups.
Time Machine keeps:
- Hourly backups for the past 24 hours
- Daily backups for the past month
- Weekly backups for all previous months
The oldest backups are deleted when your drive becomes full.
How useful is Time Machine?
- If your Mac has a hard drive failure and you have to replace the internal drive, when you turn the machine back on having installed OSX then the machine will offer the opportunity to restore the machine from the most recent Time Machine back up.
- This back up will restore all your data, settings, passwords, desktop files, photos, music, in summary everything.
- Occasionally you will find you will have to put in product codes to activate software.
- The restore process can take a few hours, I ran mine over night the couple of times I’ve had to do this.
- You can restore individual files, say you had a file on your desktop some weeks ago. Then you can enter Time Machine and track back and find the file again by literally going back in time. You can then restore that file. If a later version exists then you can opt to replace or keep both versions of the file, which is useful with changing files.
- You can split your Time Machine back ups across more than one drive, Time Machine then just uses each drive in turn. This helps to increase the overall security of your back ups in the case of an external drive failure.
- Running Time Machine will not slow down your machine, it all happens comfortably in the background and you will hardly notice it happening.
Problems with Time Machine?
Occasionally you might get an error message that says that Time Machine hasn’t been able to verify the latest back up. There seems to be very little you can do about this about from starting the process off again. Time Machine will start a new back up and delete the old one. This is a good reason for using more than one external drive for Time Machine back ups.
In my case I use a locally connected USB external drive as one Time Machine drive and a network connected MyCloud drive as the other one.
On rebooting the external drive will not always be picked up. Let me explain.
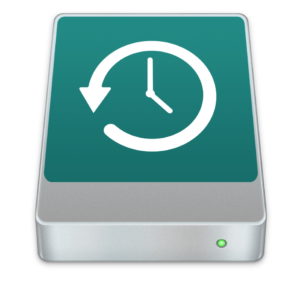
The external Time Machine drive icon is normally shown on your desktop on your Mac and it will look like this:

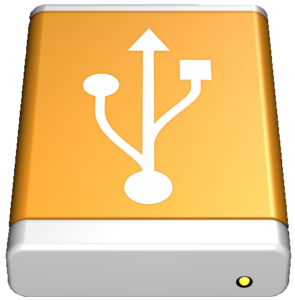
A normal non-Time Machine drive will look like this:

On start up or rebooting if your Time Machine drive looks likes the ‘Yellow/Orange’ drive above it might be functioning ok as your Time Machine back up drive, but just to be certain there are a few simple things you can try to ensure it turns to ‘Green’
- Starting with the simple test. Hover your cursor over the Finder icon on the dock (normally at the left) press the ‘Alt’ key on the keyboard then ‘Right Click’ the mouse and then left click on ‘Relaunch’ Finder will relaunch and then check to see if your drive icon has changed to ‘Green’
If it hasn’t then go to the next step.
2. Go in to System Preferences, Time Machine. Click on Add or Remove Back Up Disk and then click on your external drive again, then ‘Use Disk’
You can then close System Preferences. If the Time Machine Icon hasn’t turned ‘Green’ try relaunching Finder again using the Alt, Right Click, Relaunch routine again. It should then turn ‘Green’ and all should be working as it should.
As reboots of Macs is normally fairly infrequent, you will not be doing this that often.
Every so often you can check in Time Machine System Preferences, this is will show the latest and oldest back up dates, how much drive space you have.
If you disconnect your Time Machine drive from your computer, Time Machine will politely remind you that you haven’t backed up for n weeks with an on-screen message after about 10 days. Hence why it is always best to keep the drive connected when ever possible.
Finally.
This has been a lightning tour of what Time Machine can offer, but it really is a useful feature built-in to OSX that you should be using. External drives are not expensive these days. So get one and get using Time Machine… And remove the drive to a safe place if you are going away for any length of time.

