Google have decided to stop their ‘Subscribe by email’ service using Feedburner. If you wish to continue to follow my blog by email, please visit the blog and resubscribe by email to the new service I have added in the side bar.
Thank you.
A view of technology and some non-technical things.
Google have decided to stop their ‘Subscribe by email’ service using Feedburner. If you wish to continue to follow my blog by email, please visit the blog and resubscribe by email to the new service I have added in the side bar.
Thank you.
If you like RSS you tend to want to have all your content in one place—your RSS reader.
But if you also follow some channels on YouTube this is a problem, since Google doesn’t publish RSS feeds for channels. They want you to start and stop on YouTube, basically.
So here’s how to create an RSS feed from any YouTube channel.
Steps
https://www.youtube.com/feeds/videos.xml?channel_id=UC39ZfoNWe5zYFD1D0hTRRsQ
Now you can paste that into any RSS reader and you’ll be able to track when new content is posted.
If you don’t see the Channel ID in the address of the channel.
channel-external-idhttps://www.youtube.com/feeds/videos.xml?channel_id=UCBcRF18a7Qf58cDRy5xuWdE
Now you can paste that into any RSS reader and you’ll be able to track when new content is posted.
With some channels if you go to their videos it will just show the channel name like this:
https://www.youtube.com/user/dpreviewcom/videos
Just copy and paste that in to your RSS reader, it might work and it will save you from having to dive through the page source code to find the channel ID
I use Protopage as my RSS reader and home for all my bookmarks, I monitor hundreds of channels and blogs using this site.
You can easily share posts on Twitter or other social media networks from within the Flipboard app. However, if you want it to share posts automatically then it is actually quite easy to do with the use of an external service.
Each magazine on Flipboard has an rss feed already. So each time you add an article to a magazine that RSS feed gets updated. The rss feed address is the web address of your magazine with .rss added on the end of it. You can test this out by putting the address with .rss on the end in to your own RSS feed reader, in my case I use Protopage.
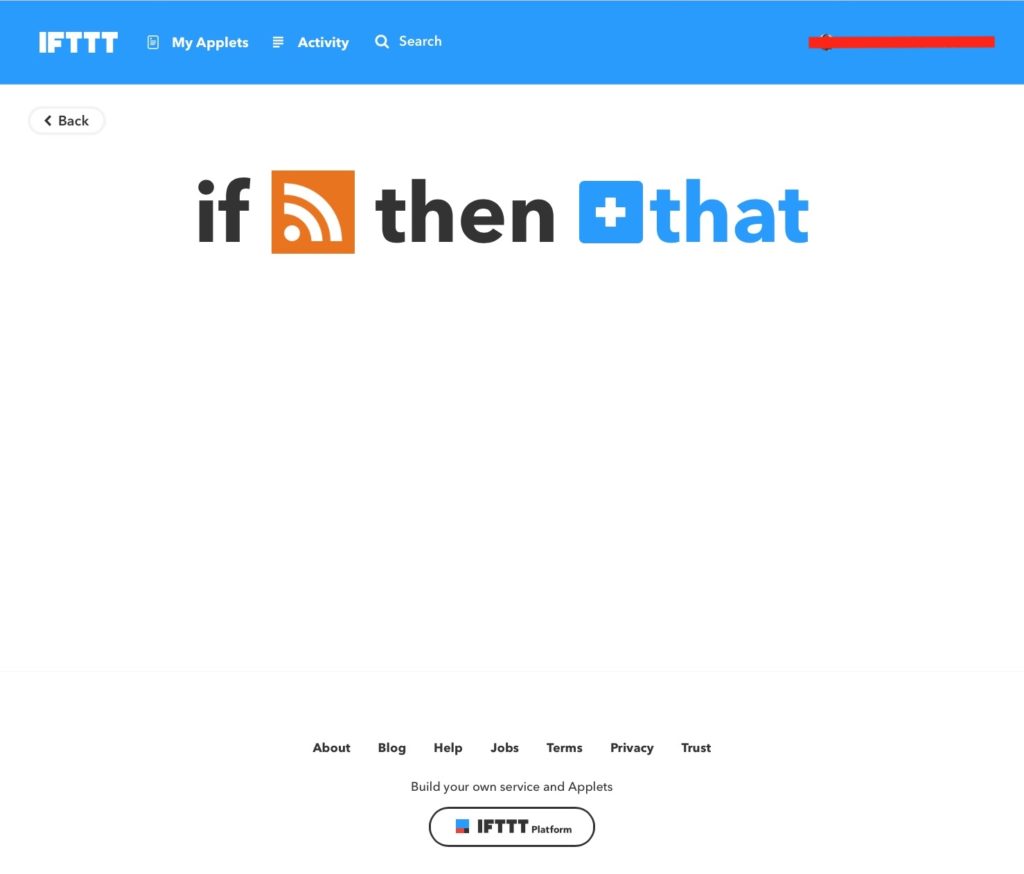
Having an RSS feed means we can easily direct new entries to a Twitter account using a free service called IFTTT or ‘If This Then That’ You create a simple ‘recipe’ within the app/site to do what ever you want.
In this case you take the RSS feed and send it to Twitter. Within the ‘recipe’ you can add things like ‘Via Flipboard [Magazine address] or similar and also add appropriate HashTags on each tweet.
I’m assuming you already have set up an IFTTT account and that you have given IFTTT access to a Twitter account.
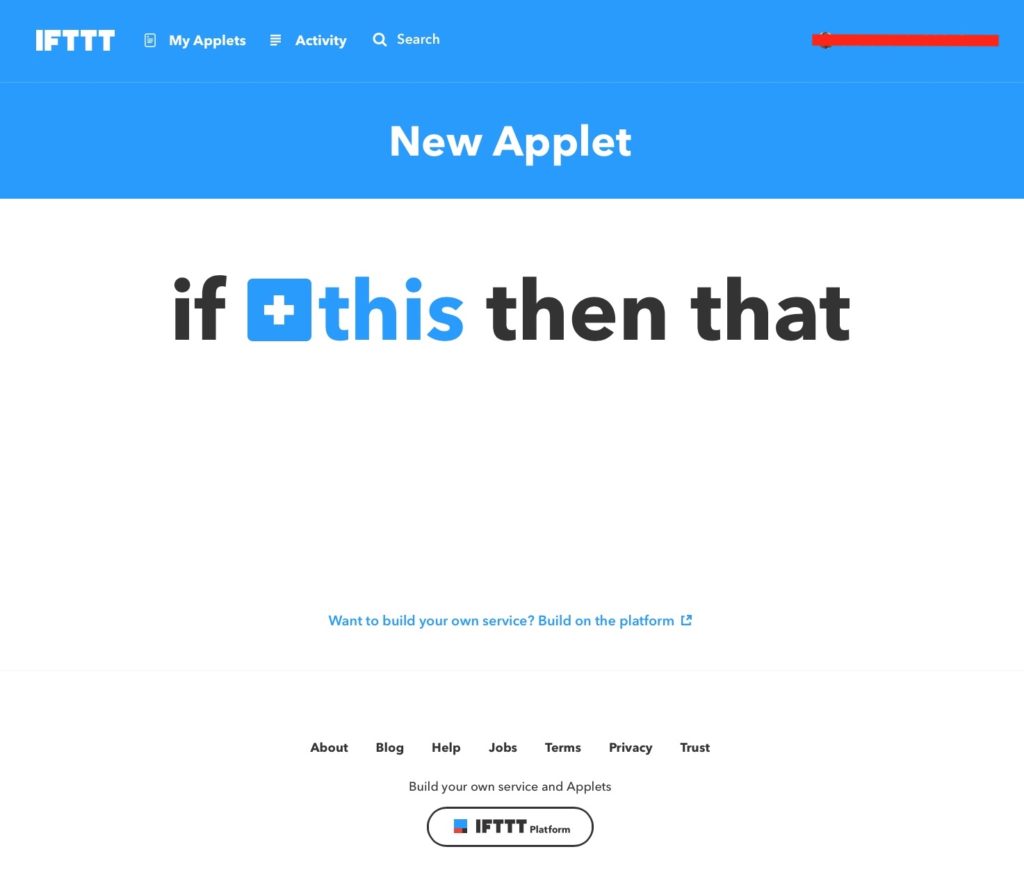
So log in to your IFTTT account and click on My Applets and then ‘New Applet’ and you should see the following screen.
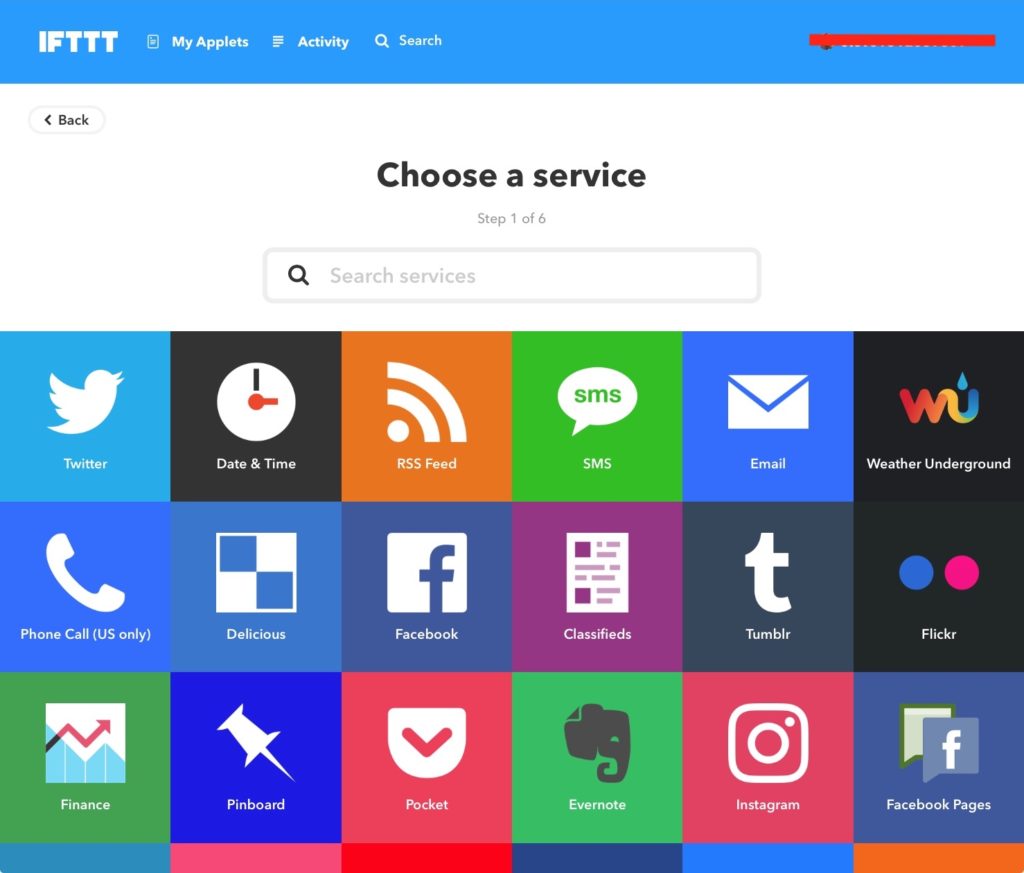
Then click on the + This and you will go through to the Choose a service.
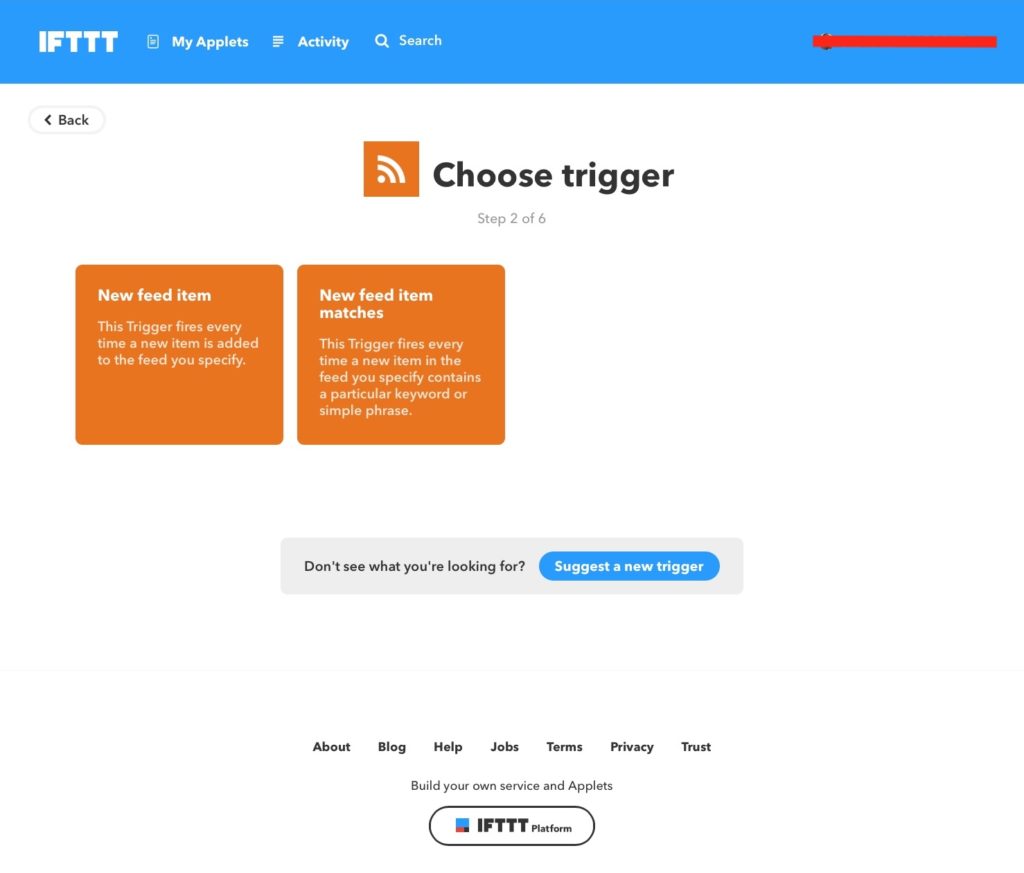
Click on RSS feed and you will get the ‘Choose Trigger’ screen, click on New Feed Item.
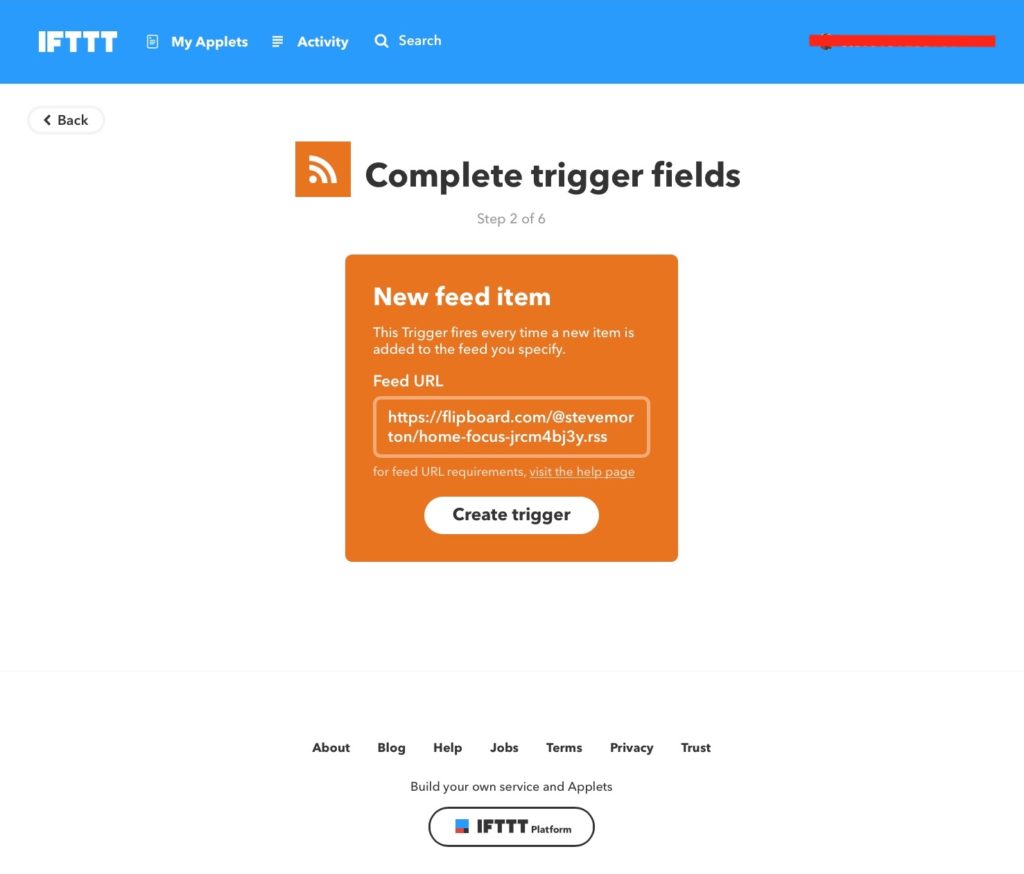
You then need to add in the address of the RSS feed of your magazine. To get the address go to: https://flipboard.com/profile, then click on your magazine so you are viewing it in the browser. Then select the address from the address field of the browser and paste it in to the Feed URL field on IFTTT, and then add .rss at the end of the address. Then click Create Trigger.
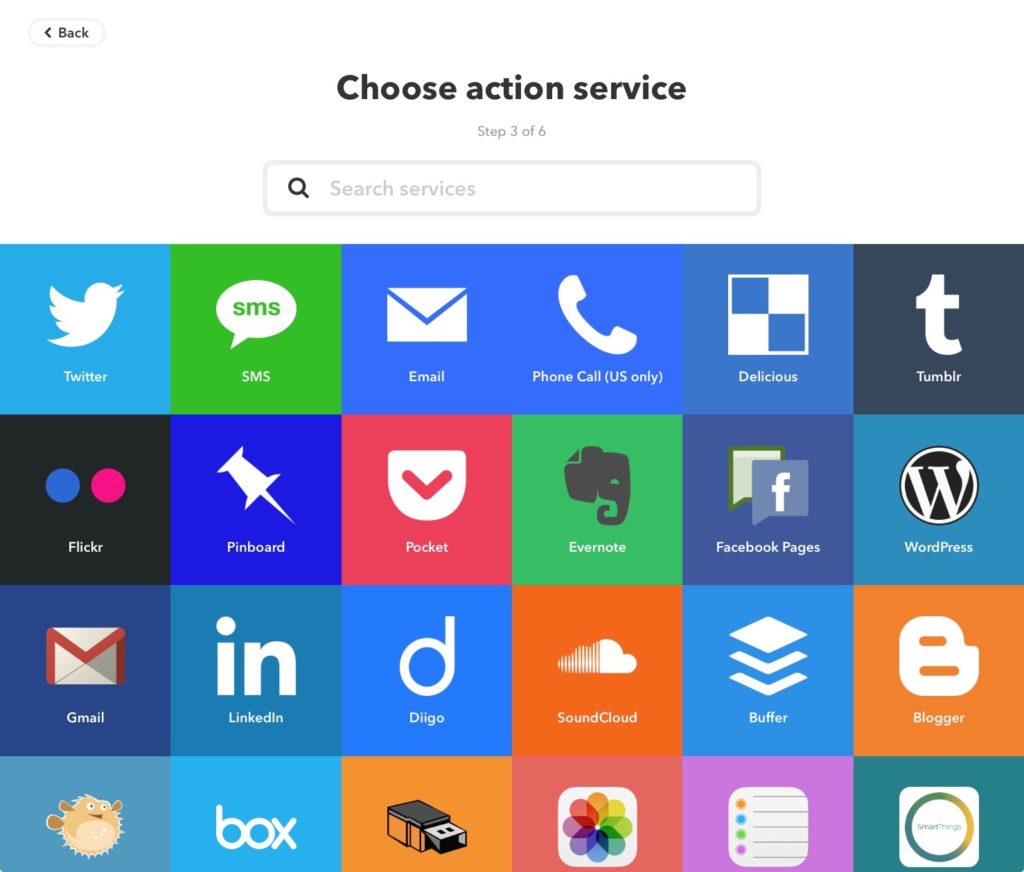
We then have to tell what IFTTT should do every time it finds a new item in your rss feed. Click on +that
In this example we are going to output the new item to Twitter, so click on Twitter in the Choose action service screen, but you could also post to a Facebook page, your blog, email or a host of other services!.
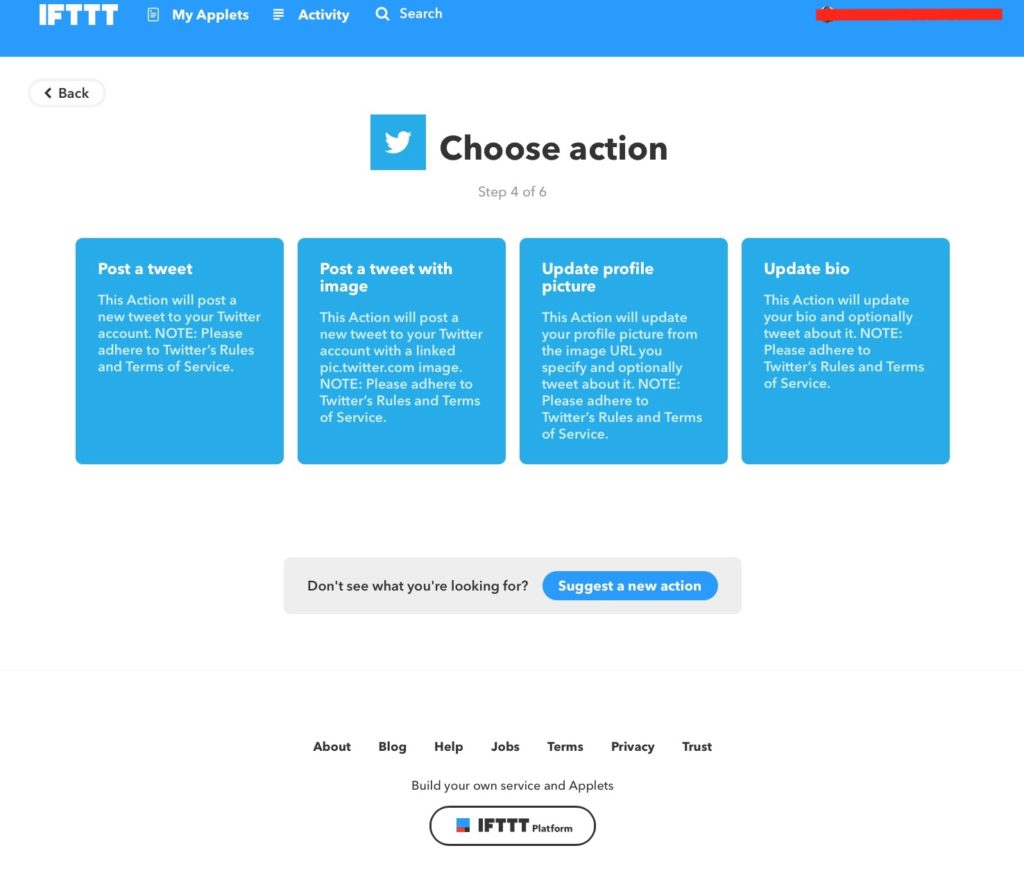
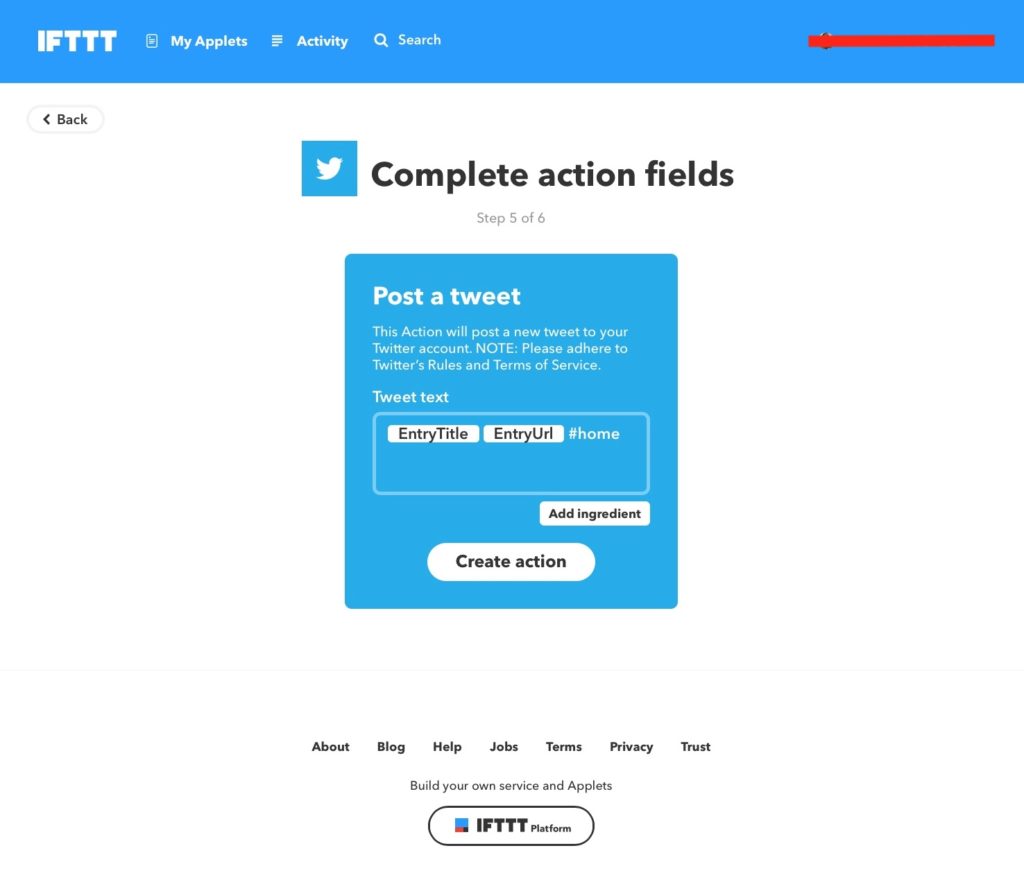
Click on Post a tweet in the Choose action screen.
Left as it is IFTTT will post a tweet with just the Title and the link to the post.
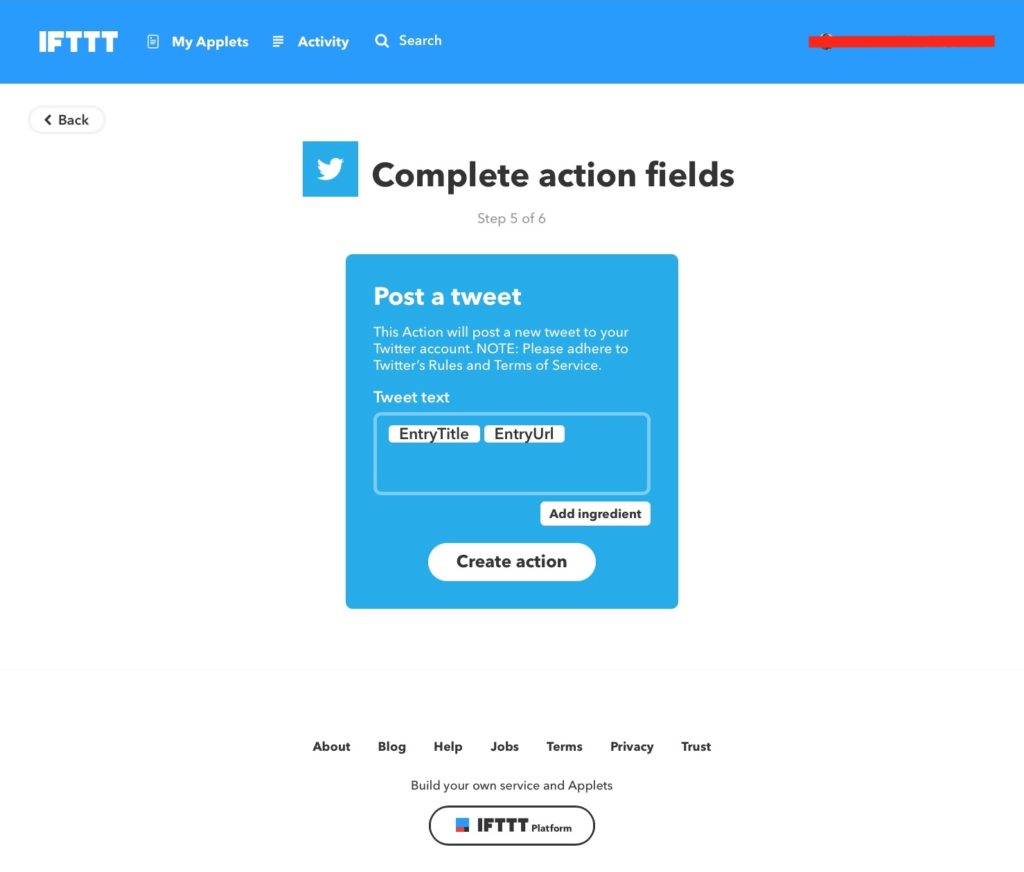
But you can add hashtags to your tweet and may be a link back to your magazine or your website. Be aware of the character limit on Twitter (280 characters) so you might need to experiment with this field. Click on Create action.
This screen lets you review the whole applet. Click Finish to finalise the applet.
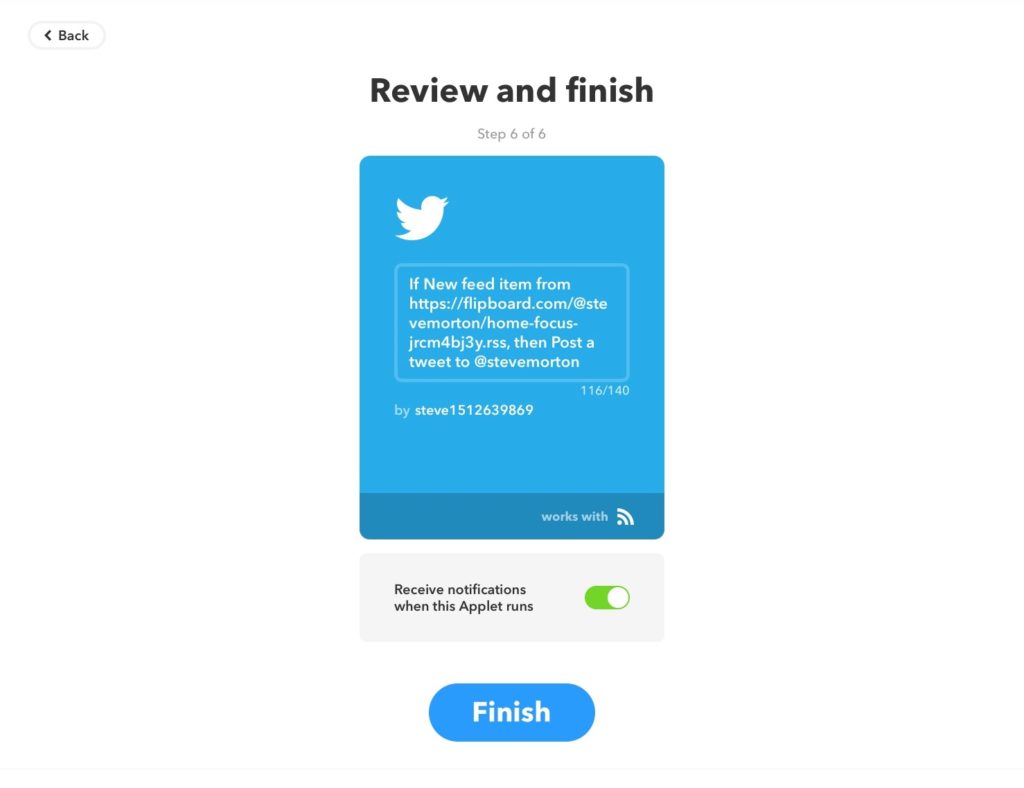
You can test your applet by flipping a new article in to your magazine and then check your Twitter feed to see the result.
I’ve been using this method experimentally with a few of my magazines for a few month and it has generated a bit more traffic to the magazines as well as to the sites the articles were from, including my own blog.
![]() If you use Blogger/Blogspot for your blog you will have noticed that since 25 May you will not have received emails containing the comments.
If you use Blogger/Blogspot for your blog you will have noticed that since 25 May you will not have received emails containing the comments.
Also missing are emails about comments that need moderating or emails of new posts on your blog.
This was all connected to the new GDPR regulations and permission to send emails. Even though you had put these email addresses in yourself years ago!
There is now a simple fix, starting with emailing new comments:
Each emailed comment then has an unsubscribe link/option at the foot of the email, therefore they now comply with GDPR.
You can do the same trick for Comment Moderation. Comment Moderation is also in Settings in Posts, comments and sharing, Comment moderation.
Again do the same, remove the email address, save settings, put in the email address then save settings.
You will get another email asking you to confirm with a link.
‘Email posts to’ is in Settings, Email just below Comment Notification.
I hope that solves the issues for you. I have been missing getting the emails when new comments arrive on the blog!
Do you use an Apple Mac? If you do then Time Machine is a great way of backing up your files from your machine to an external drive on a frequent basis.
So some quick tips about Time Machine:
Time Machine keeps:
The oldest backups are deleted when your drive becomes full.
How useful is Time Machine?
Problems with Time Machine?
Occasionally you might get an error message that says that Time Machine hasn’t been able to verify the latest back up. There seems to be very little you can do about this about from starting the process off again. Time Machine will start a new back up and delete the old one. This is a good reason for using more than one external drive for Time Machine back ups.
In my case I use a locally connected USB external drive as one Time Machine drive and a network connected MyCloud drive as the other one.
On rebooting the external drive will not always be picked up. Let me explain.
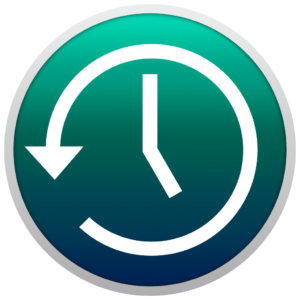
The external Time Machine drive icon is normally shown on your desktop on your Mac and it will look like this:
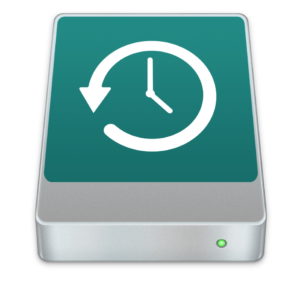
A normal non-Time Machine drive will look like this:
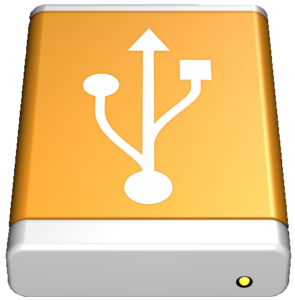
On start up or rebooting if your Time Machine drive looks likes the ‘Yellow/Orange’ drive above it might be functioning ok as your Time Machine back up drive, but just to be certain there are a few simple things you can try to ensure it turns to ‘Green’
If it hasn’t then go to the next step.
2. Go in to System Preferences, Time Machine. Click on Add or Remove Back Up Disk and then click on your external drive again, then ‘Use Disk’
You can then close System Preferences. If the Time Machine Icon hasn’t turned ‘Green’ try relaunching Finder again using the Alt, Right Click, Relaunch routine again. It should then turn ‘Green’ and all should be working as it should.
As reboots of Macs is normally fairly infrequent, you will not be doing this that often.
Every so often you can check in Time Machine System Preferences, this is will show the latest and oldest back up dates, how much drive space you have.
If you disconnect your Time Machine drive from your computer, Time Machine will politely remind you that you haven’t backed up for n weeks with an on-screen message after about 10 days. Hence why it is always best to keep the drive connected when ever possible.
Finally.
This has been a lightning tour of what Time Machine can offer, but it really is a useful feature built-in to OSX that you should be using. External drives are not expensive these days. So get one and get using Time Machine… And remove the drive to a safe place if you are going away for any length of time.